

Android app development for beginners is easy enough, but the right direction and some skills are surely needed.
You may have an amazing app idea to convert into reality and spectacle to the world, but lack of experience can be an obstacle. Here, there is a step by step tutorial to solve the problem. It is quite easy to follow.
You do not have to be a university graduate in programming or information technology to create an application for Android. According to the fact, Android is the most widely used OS in phones, tablets and many other gadgets today with more and more apps coming out every day.
These apps are related to every category of life and you can also master this skill if you have the inclination for it.
Because coding is hard to learn and with android app development, it can become even harder especially for the beginner who has no clue where to take initiative from. For that, learning Java is essential with installing specific software that works differently.
On the whole, there is SDK (Software development kit), an IDE (Integrated development environment, JDK (Java software development kit) and a virtual device for testing purposes are required to build apps from scratch. There is a complete set up that has to be installed.

- Explore More :- What is Hacker ? What Is Types Of Hacker's.
This is an easily understandable guide for beginners who wish to create an app for Android devices. Steps are mentioned below:
Benefits Of Android App Development
There are lots of benefits associated with the android app development for beginners These benefits tempts application developers and users and choose Android-powered mobile applications. Understanding of the benefits is the main art development day will help you work better for you. Various benefits include :
1) Android application development is easy to adopt because it runs mainly in Java programming language. And it is widely used by programmers today.
2) Android application inherits ownership of multiple sales channels as it can be implemented in many different ways, which eliminates the need to rely on more than one market. Rather, Android developers can sell over your own website or contact the third party.
3) It is easy to integrate Android application with various business processes, allowing easy customization of the entire platform-tools by integrating your application with ease.
4) Android is an open-source offering update that is an open-source technology interface and application framework. There is a big community working on the development of Android platform-tools and technology.
5) Android is known for its low barrier to entry and simply requires low-cost i9nvestment and is determined to provide relatively high ROI.
Steps To Android App Development For Beginners
1. Download Android Studio
An IDE or integrated development environment is required for programming in most languages. Android Studio is the most widely used IDE for Android development.
Google is the name behind the android studio. Simply download it and start using it. IDE gives the main user interface for the app where you are going to enter code. You are not going to type it in notepad.
It will also identify errors and blunders in the process that you are making. It offers great suggestions and allows operate and run of your developed apps smoothly in a convenient manner.
Android studio makes files that you require and gives basic layouts, saving lots of effort as well as time.
Below you can see in an image where you can download an android studio.
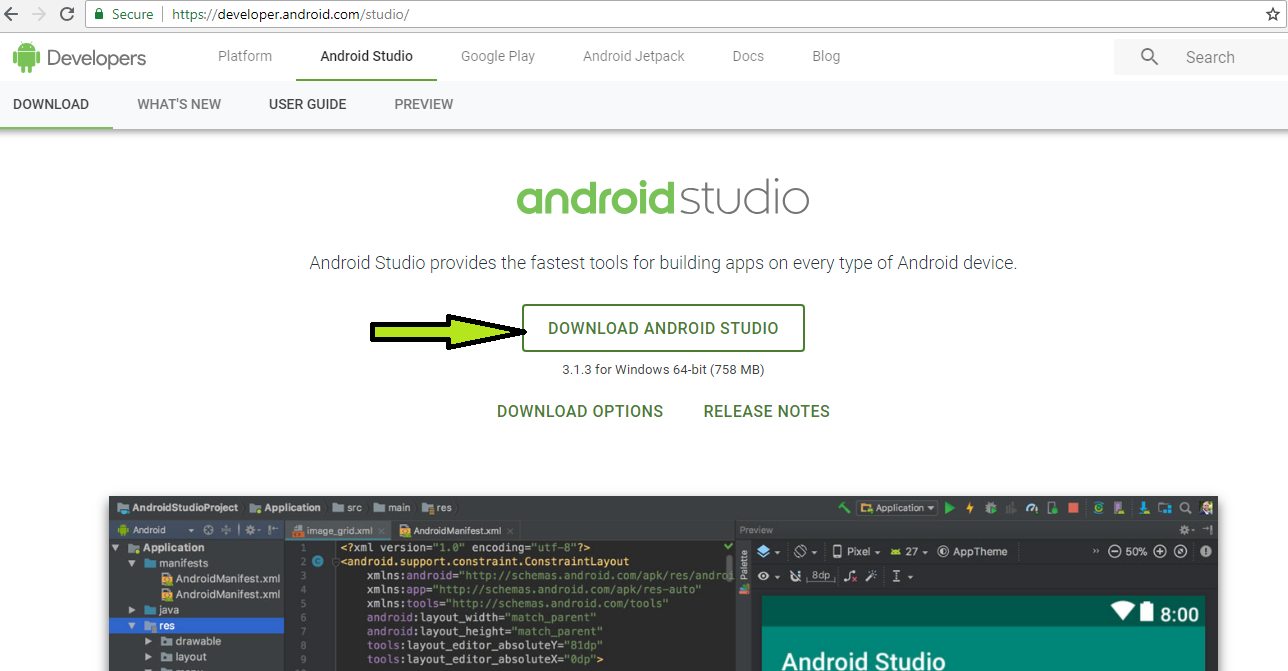
Android Studio is for the development of Android.
There are some other IDEs too that work differently and support other app developments as well apart from Android. After downloading and installing Android Studio, you need to go to step two.
2. Setting Up The Android Studio
After installation of Android Studio, the time comes to setting it up. Before running it, install Java on the computer to ensure the IDE works perfectly.
Install JDK (Java development kit) thereafter. Java is a programming language for developing apps. It is one of the most important programming languages.
It is important to install JDK to enable Android Studio to compile and interpret code.
Launch Android Studio by clicking it. It gives a menu after opening up. There are some options on the menu. Android SDK is updated so that it can support the latest versions of the SDK manager.
Three things are important while using Android Studio to develop apps, they are :
- Android Studio is an IDE. It gives an interface for coding.
- The code you will write in Java –JDK (Java Development Kit)
- SDK is accessible by java code for the procedure to go further
Below is the welcome screen you’ll see after installing android studio.

3. Start A New Project
When samples are ready, go back to the first page where the loading of Android Studio takes place. Choose Start a new Android Project and enter the name of the app with the company domain.
This will be used in combination to make the package name in this format:
Com.companyname.appname

The package will become the complied file known as APK (Android Package File) and the uploading will be done on the Play Store.
Avoid using comic or funny phrases and words. The last field is the directory which has all files related to the app.
It is wise to have a backup of the code so you can save online. Then choose the device type for which you are going to develop the app. Select Phone and Tablet option among other options like TV, Wear, and Glass. In the beginning, it is good to stay limited to phones and tablets.

Minimum SDK is another option that is beneficial. It is the lowest Android version that it supports. Don’t select the latest Android version here because all Android users may not have the updated version of Android.
Choosing the default option is also fine. On the next page, there is an option to choose the way the app looks in the beginning.
It is the main Activity Module. It is the main page of the app. Here you can decide whether the app title will remain on top of the screen or user interface will fill the whole page.

Since you are a beginner, it’s better to start off with something simpler and sleek. Choose Basic Activity or Empty Activity. This will be your android application.
Go to Next for the last few options. Now, choose the name that you would like to give to your activity. Also, choose layout names like ‘Main Activity’ or something that makes sense.
The layout name will determine the layout of the activity. It’s a separate code that runs with the main activity code. It helps to define where menus and images go and the usage of fonts.

4. Creating A Real App
When the app opens, there should be a directory tree on the left side with all files and folders related to the app(as shown in the below screen image) and the picture of a phone saying Hello World in the center.
The tab ‘activity_main.xml’ is visible on the display. A second XML file will also be visible as well if you chose Basic Activity when the project starts.
Android Studio does not display XML code but a rendering of how the layout is going to appear. It’s a visual editor like web development software. There is an option of widgets on the left that you can add to the app. Delete Hello World widget. Also, if you like to change the text on button to Hello. Change id on the button to ‘button1’. Choose text size and color of your choice at the bottom.
There will be a default code in the screen as shown in the below screen.

5. Add Code And Run The App
Open MainActivity.java. This code defines your app behavior. Now add a passage of code.
Public void buttonOnClick(View v) {
Button button1 = (Button) v;
( (Button) v).setText(”Hello!”); }
Anything following voidbuttonOnClick will come into action when a user clicks on the button.
There is the word ‘Import’ at top of the page, click that. There should be a line import android.widget.Button. It should appear by itself when you typed last bit but you can also add it yourself if it does not.
In the content_main.xml menu click on the button and then select the OnClick line of code that you had written from the drop-down menu. It is for the purpose of associating the code section with the button.
Select ‘run app’ from the drop-down menu to run your apps. An AVD installed file will be present there. Follow the steps to launch the android emulator running app.
- Explore More :- what is robot and how does it work ?


